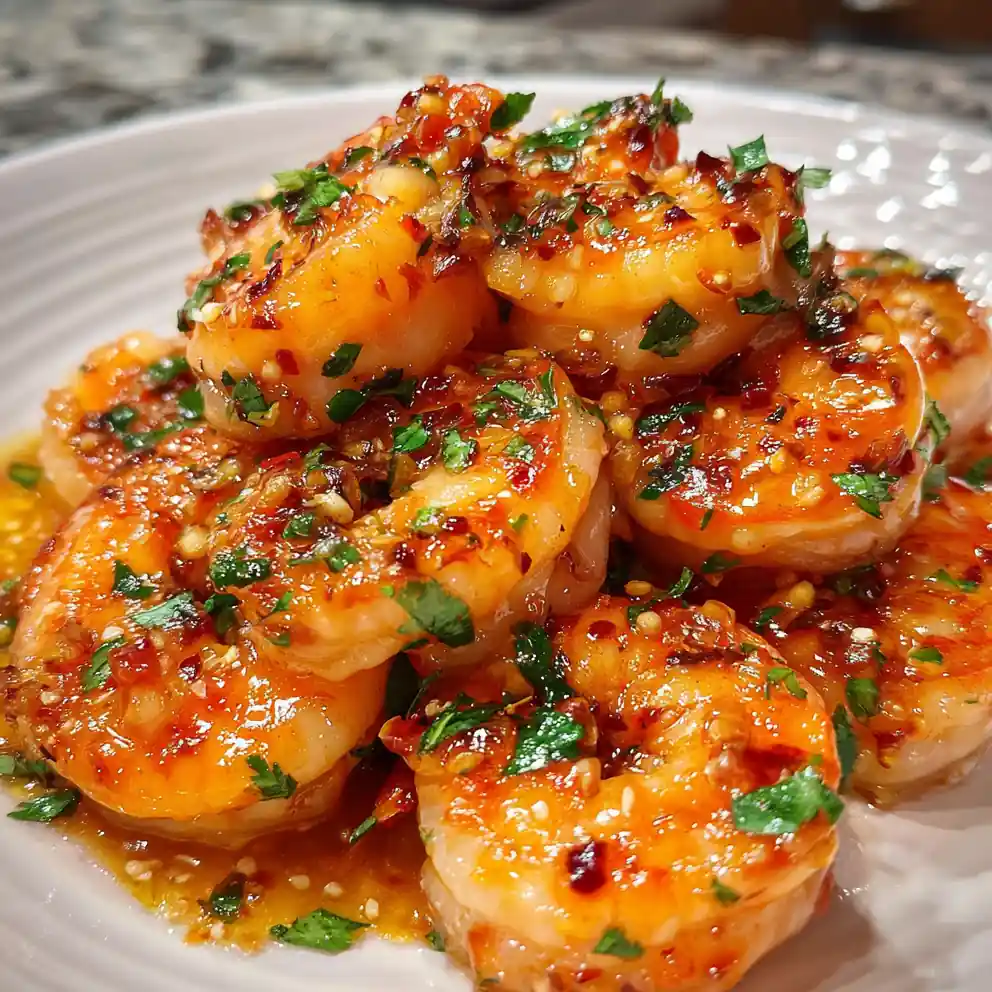
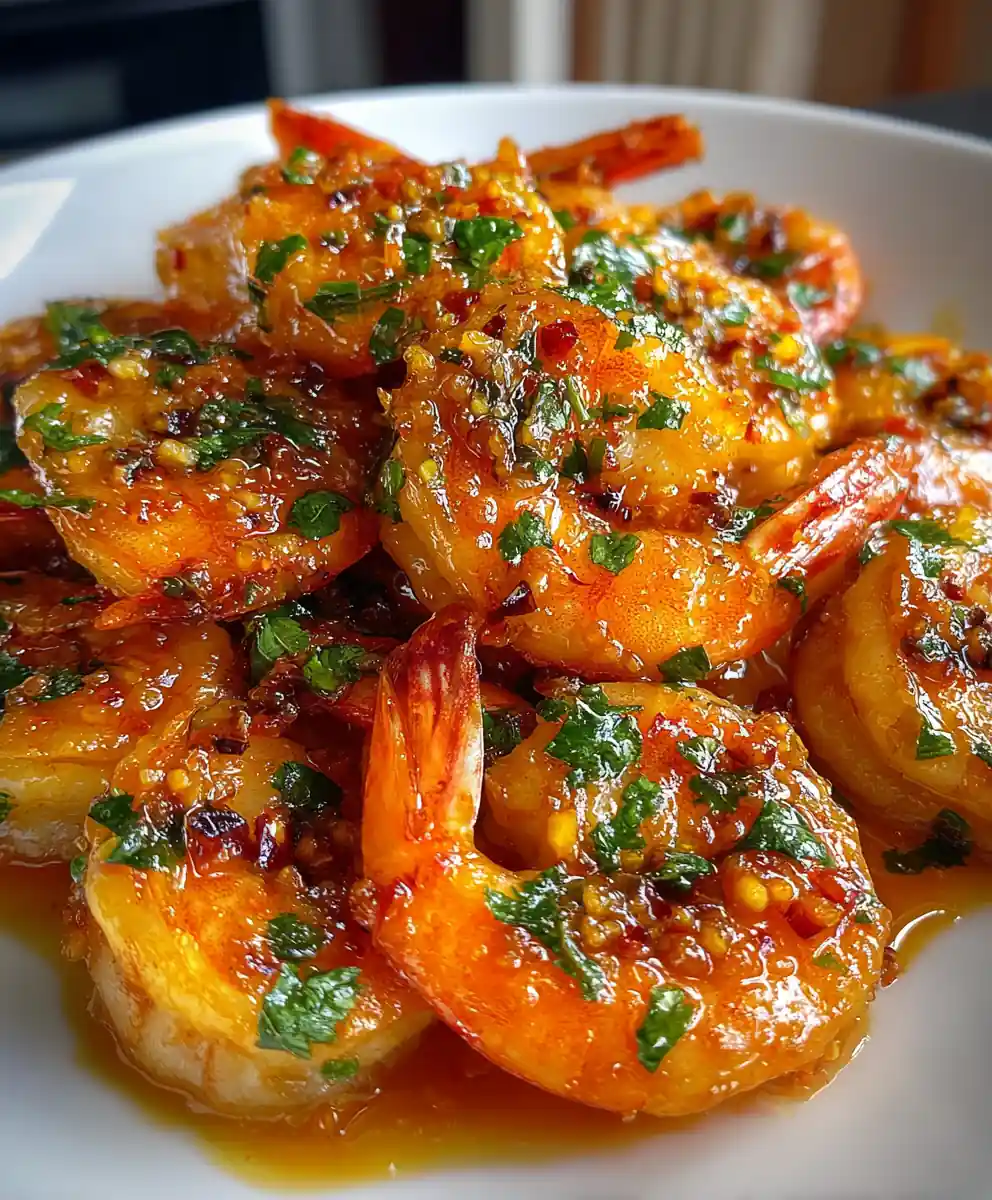
I’ve found the secret to weeknight meal success lies in dishes that deliver big flavor with minimal fuss, and this Lilikoi-Chili Hawaiian Garlic Shrimp recipe is exactly that.
Its vibrant, tangy sauce, kissed with a touch of heat, clings perfectly to succulent shrimp, creating an aroma that makes your kitchen smell like a tropical escape. This dish is a true family-friendly hero, perfect for busy evenings, offering a healthy and undeniably delicious option that everyone will love.

Ingredient Details & Better Choices
Core Ingredients for Juicy Lilikoi-Chili Hawaiian Garlic Shrimp
- Fresh or frozen shrimp (peeled, deveined, tail-on or off): 1 lb (450g), medium-large. Choose quality shrimp for the best texture and flavor in this Lilikoi-Chili Hawaiian Garlic Shrimp.
- Butter or olive oil: 4 Tbsp (60ml). Use unsalted butter for richer taste, or a good quality olive oil for a lighter approach.
- Fresh garlic, minced: 6-8 cloves. Essential for that pungent, aromatic base.
- Lilikoi (passion fruit) juice or pulp: ¼ cup (60ml). This brings the unique tropical tang. (If fresh isn’t available, look for unsweetened frozen pulp.)
- Sweet chili sauce or sriracha: 2 Tbsp (30ml), adjust to taste. Adds a sweet heat kick. (For a milder option, use less or a mild sweet chili sauce.)
- Soy sauce or tamari (gluten-free option): 1 Tbsp (15ml). Deepens the umami notes.
- Lime juice: 1 Tbsp (15ml). Brightens and balances the flavors.
- Fresh cilantro, chopped: For garnish, adding a burst of freshness.
Premium & Healthier Upgrades
- Opt for organic, wild-caught shrimp for superior flavor and responsible sourcing, enhancing this healthy dinner idea.
- Use reduced-sodium soy sauce or tamari to control salt intake.
- Avocado oil instead of butter offers a lighter, heart-healthy alternative.
- Fresh lilikoi pulp, if you can find it, provides unparalleled freshness and robust flavor.
Substitutions to Fit Different Diet Plans
- For Keto/Low-Carb: Omit sweet chili sauce or use a sugar-free alternative. Serve your Lilikoi-Chili Hawaiian Garlic Shrimp with cauliflower rice or zoodles.
- For Vegan: Substitute shrimp with firm tofu or king oyster mushrooms, and butter with vegan butter or olive oil.
- For Gluten-Free: Use tamari instead of regular soy sauce for a naturally gluten-free dish.
- For Diabetic-Friendly: Opt for sugar-free sweet chili sauce or use red pepper flakes for heat without added sugar.
Notes on Seasonal or Sustainable Sourcing
Choose sustainably sourced shrimp, often labeled with certifications like ASC or BAP, supporting better ocean practices. Lilikoi (passion fruit) is best in summer and fall; however, unsweetened frozen pulp is a fantastic year-round option for consistent flavor.
Step-by-Step Cooking Directions
Get Ready: Prep & Marinade (5-10 minutes)
- Pat shrimp dry. Place the shrimp on paper towels and gently blot to remove excess moisture; this helps them achieve a better sear.
- Combine marinade. In a medium bowl, toss the dried shrimp with 1 Tbsp olive oil, 2 cloves minced garlic, and a pinch of salt and pepper until evenly coated.
Cook the Lilikoi-Chili Hawaiian Garlic Shrimp (10-15 minutes)
- Heat skillet. Heat a large 10-inch skillet over medium-high heat with 2 Tbsp butter or oil until it shimmers and just begins to foam.
- Sear shrimp. Add half the marinated shrimp to the hot skillet in a single layer. Cook for 1-2 minutes per side until they turn opaque and pink. Remove the cooked shrimp to a clean plate.
- Repeat. Cook the remaining shrimp batch, ensuring not to overcrowd the pan for proper searing, then add it to the plate with the first batch.
- Sauté garlic. Reduce heat to medium. Add the remaining 2 Tbsp butter or oil and the rest of the minced garlic to the skillet. Sauté for about 30 seconds until the garlic is fragrant and lightly golden. If the garlic is browning too quickly, add a teaspoon of water to cool the pan.
- Build sauce. Pour in the lilikoi juice, sweet chili sauce, soy sauce, and lime juice. Bring the mixture to a gentle simmer, stirring occasionally, and cook for 1-2 minutes until slightly thickened.
- Finish the dish. Return all the cooked shrimp to the skillet, tossing gently to coat each piece evenly with the flavorful Lilikoi-Chili Hawaiian Garlic Shrimp sauce. Cook for another 1-2 minutes, just until the shrimp is heated through and the sauce clings beautifully.
Optional Variations for Popular Appliances
- Air Fryer Lilikoi-Chili Hawaiian Garlic Shrimp: Marinate shrimp, then air fry at 375°F (190°C) for 8-10 minutes, flipping halfway until pink. Prepare the sauce separately and toss the shrimp with it after cooking.
- Oven-Baked Lilikoi-Chili Hawaiian Garlic Shrimp: Marinate shrimp, spread on a baking sheet, and bake at 400°F (200°C) for 8-12 minutes until they turn pink and opaque. Prepare the sauce separately and toss the baked shrimp with it.
Mini Troubleshooting Callouts
Overcooking Prevention: Shrimp cooks very fast! Watch closely for it to turn uniformly pink and opaque. Overcooked shrimp becomes rubbery and tough quickly. If Sauce is Too Thin: Let it simmer gently for an extra minute or two to allow it to reduce and thicken slightly. If too thick, add a splash of water or lime juice.
Serving Ideas & Occasions
This Lilikoi-Chili Hawaiian Garlic Shrimp is incredibly versatile, making it perfect for various occasions. It’s a go-to for quick weeknight meals or an impressive addition to family gatherings.
Ideal Uses for Your Lilikoi-Chili Hawaiian Garlic Shrimp
Enjoy this flavorful hawaiian garlic shrimp recipe as a fast weeknight dinner, as a high-protein meal prep component, or as a vibrant dish for summer barbecues.
Pairing Suggestions
- Serve with fluffy white or brown rice for a classic complement.
- Cauliflower rice makes a great low-carb alternative.
- Add sautéed green beans or broccoli for a complete, healthy meal.
Storage and Reheating Tips
Store cooked Lilikoi-Chili Hawaiian Garlic Shrimp in an airtight container in the fridge for up to 3 days. For optimal texture, I gently reheat leftovers in a skillet over medium-low heat, as freezing cooked shrimp is not recommended.
Nutrition & Lifestyle Advantages of Lilikoi-Chili Hawaiian Garlic Shrimp
This recipe offers significant health benefits, making it an excellent choice for a healthy lifestyle. Shrimp provides an outstanding source of lean protein, supporting muscle health and satiety. The dish’s vibrant flavors come from natural ingredients, making it a delicious alternative to heavier options. It easily adapts for various diet goals, fitting well into high-protein recipes, weight-loss meals, or gluten-free cooking. Enjoy sustained energy and a boosted mood from this fresh, tangy, and subtly spicy meal.
Time, Cost & Practical Value
Prep vs Cook Time Breakdown
This Lilikoi-Chili Hawaiian Garlic Shrimp comes together quickly: plan for 10 minutes of prep time and 10–15 minutes of actual cook time, bringing your total to a mere 20–25 minutes.
Cost Per Serving and Budget Tips
Typically costing $4–$6 per serving, you can manage your budget by looking for sales on frozen shrimp. Buying larger quantities of garlic and lilikoi juice also helps keep costs down for this family-friendly recipe.
Meal Prep Strategies
This recipe is excellent for meal prep; cook a double batch of the shrimp and store it separately from your chosen sides like rice or vegetables. The sauce can be made ahead, and cooked shrimp works wonderfully cold in salads the next day.
Shopping & Ingredient Sourcing
Where to Buy Lilikoi-Chili Hawaiian Garlic Shrimp Ingredients
Fresh shrimp, garlic, and limes are readily available at local markets or supermarkets. For specialty chili sauces and lilikoi juice or pulp, Asian grocery stores are often the best resource, while online delivery offers convenience for all ingredients.
Tips for Picking High-Quality Options
When selecting shrimp, choose firm, translucent pieces with a mild, fresh scent; avoid any with black spots. If opting for fresh lilikoi, look for heavy, slightly wrinkled fruit; for juice, check labels for pure pulp without excessive added sugar.
Mentions of Meal Kits, Grocery Subscriptions, Online Organic Stores
While some meal kits provide similar Asian-inspired shrimp dishes, this homemade version offers a fresh, healthier alternative. For premium, sustainably sourced shrimp and organic lilikoi pulp, online organic stores are a fantastic resource, supporting a healthy eating lifestyle.

Pro Adjustments & Hacks
Advanced Flavor Boosts
- Add red pepper flakes for extra heat.
- A splash of fish sauce deepens the umami.
- Grated fresh ginger in the sauce adds an aromatic kick.
Test-kitchen tip: I often add a tiny pinch of red pepper flakes during the last 30 seconds of sautéing the garlic; it really boosts the heat and aroma without altering the sauce’s texture for this hawaiian garlic shrimp recipe.
Adjustments for Kid-Friendly vs Gourmet Versions
For a kid-friendly version, reduce or omit the chili sauce entirely, perhaps adding a touch of honey for sweetness. To elevate it to a gourmet experience, use jumbo prawns and finish the dish with a drizzle of high-quality sesame oil.
Allergy-Safe Modifications
To make this recipe dairy-free, simply use olive oil or vegan butter instead of traditional butter. This Lilikoi-Chili Hawaiian Garlic Shrimp is naturally nut-free; always check all ingredient labels for any potential cross-contamination.
FAQs
Can Lilikoi-Chili Hawaiian Garlic Shrimp support a weight loss diet?
Yes, absolutely! This hawaiian garlic shrimp recipe is inherently low in calories and high in lean protein, making it a very satisfying and healthy option. Pair it with a generous serving of non-starchy vegetables or cauliflower rice to maximize its weight-loss benefits.
What’s the best online source for Lilikoi (passion fruit) juice?
For lilikoi juice or pulp, I usually find success on Amazon or through specialty online food stores. When buying, always check the ingredient list to ensure you’re getting pure fruit juice without excessive sweeteners or additives.
How long can Lilikoi-Chili Hawaiian Garlic Shrimp last in the fridge/freezer?
For the best quality and flavor, consume this dish fresh. Store any leftovers in an airtight container in the refrigerator for a maximum of 3 days. Freezing cooked shrimp is not recommended; it tends to become tough and rubbery upon thawing.
Is Lilikoi-Chili Hawaiian Garlic Shrimp good for meal prep?
Yes, it’s an excellent choice for meal prep recipes! You can cook a larger batch and store the shrimp and sauce separately from your chosen sides like rice or steamed veggies. This approach helps maintain the best texture for several days.
Can I use frozen shrimp for this recipe?
Yes, absolutely you can use frozen shrimp for this Lilikoi-Chili Hawaiian Garlic Shrimp recipe. Just make sure it is completely thawed and, crucially, patted very dry with paper towels before cooking. This step prevents excess water from steaming the shrimp instead of searing it, ensuring a better texture.
What if I can’t find lilikoi (passion fruit) juice?
If lilikoi juice is unavailable, a suitable substitute can be made with a blend of orange and lime juice. While this won’t replicate the unique tropical notes exactly, it will provide a similar tangy-citrusy profile to balance the sweet chili sauce.
CONCLUSION
I find this Lilikoi-Chili Hawaiian Garlic Shrimp recipe delivers vibrant flavor, impressive speed, and great nutritional flexibility. Save this family-friendly recipe to your Pinterest board for quick, healthy weeknight dinners!
Print
hawaiian garlic shrimp recipe Lilikoi-Chili Hawaiian Garlic Shrimp
- Total Time: 25 minutes
- Yield: 4 servings 1x
- Diet: General
Description
This Lilikoi-Chili Hawaiian Garlic Shrimp recipe offers big flavor with minimal fuss, perfect for weeknight meals. Its vibrant, tangy sauce with a touch of heat clings to succulent shrimp, creating a delicious and family-friendly tropical escape.
Ingredients
- 1 lb (450g) medium-large fresh or frozen shrimp, peeled, deveined, tail-on or off
- 4 Tbsp (60ml) butter or olive oil
- 6–8 cloves fresh garlic, minced
- 0.25 cup (60ml) Lilikoi (passion fruit) juice or pulp
- 2 Tbsp (30ml) sweet chili sauce or sriracha, adjust to taste
- 1 Tbsp (15ml) soy sauce or tamari (gluten-free option)
- 1 Tbsp (15ml) lime juice
- Fresh cilantro, chopped, for garnish
- 1 Tbsp olive oil
- Pinch salt and pepper
Instructions
- Prep Shrimp: Place shrimp on paper towels and gently blot to remove excess moisture.
- Marinate Shrimp: In a medium bowl, toss the dried shrimp with 1 Tbsp olive oil, 2 cloves minced garlic, and a pinch of salt and pepper until evenly coated.
- Heat Skillet: Heat a large 10-inch skillet over medium-high heat with 2 Tbsp butter or oil until it shimmers and just begins to foam.
- Sear First Batch Shrimp: Add half the marinated shrimp to the hot skillet in a single layer. Cook for 1-2 minutes per side until they turn opaque and pink. Remove the cooked shrimp to a clean plate.
- Sear Second Batch Shrimp: Cook the remaining shrimp batch, ensuring not to overcrowd the pan for proper searing, then add it to the plate with the first batch.
- Sauté Garlic: Reduce heat to medium. Add the remaining 2 Tbsp butter or oil and the rest of the minced garlic to the skillet. Sauté for about 30 seconds until the garlic is fragrant and lightly golden. (If browning too quickly, add a teaspoon of water to cool the pan.)
- Build Sauce: Pour in the lilikoi juice, sweet chili sauce, soy sauce, and lime juice. Bring the mixture to a gentle simmer, stirring occasionally, and cook for 1-2 minutes until slightly thickened.
- Combine and Finish: Return all the cooked shrimp to the skillet, tossing gently to coat each piece evenly with the flavorful sauce. Cook for another 1-2 minutes, just until the shrimp is heated through and the sauce clings beautifully.
- Garnish and Serve: Garnish with fresh cilantro before serving.
Notes
To prevent overcooking, watch shrimp closely until uniformly pink and opaque; overcooked shrimp becomes rubbery. If the sauce is too thin, simmer an extra minute or two; if too thick, add a splash of water or lime juice. Choose sustainably sourced shrimp and reduced-sodium soy sauce/tamari for healthier options. Lilikoi (passion fruit) is best in summer and fall; unsweetened frozen pulp is a good year-round alternative.
- Prep Time: 10 minutes
- Cook Time: 15 minutes
- Category: Main Course
- Method: Stovetop
- Cuisine: Hawaiian
Nutrition
- Serving Size: 1 serving (approx. 110g cooked shrimp with sauce)
- Calories: 400 calories
- Sugar: 8 g
- Sodium: 500 mg
- Fat: 12 g
- Saturated Fat: 7 g
- Unsaturated Fat: 5 g
- Trans Fat: 0 g
- Carbohydrates: 13 g
- Fiber: 1 g
- Protein: 22 g
- Cholesterol: 180 mg
