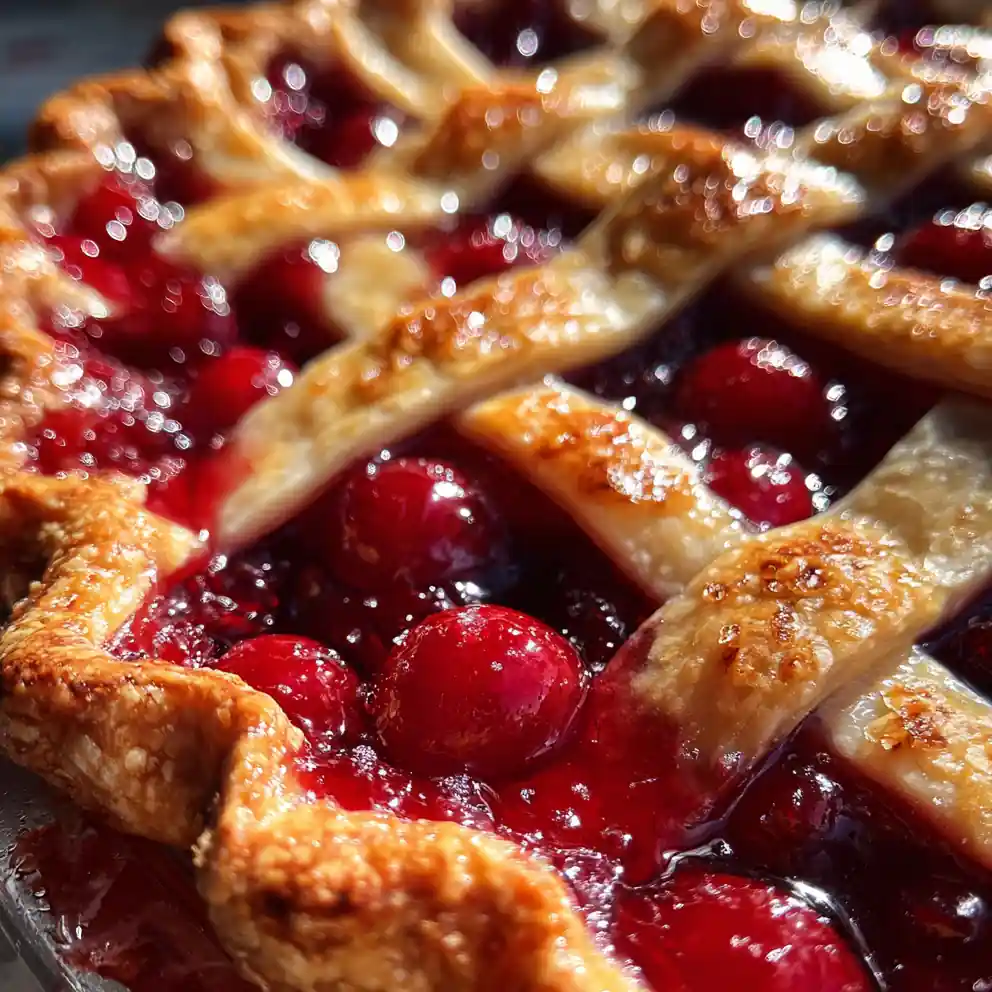
I’ve perfected this Ruby Cherry Pie With Lattice Top to be a showstopper without the kitchen fuss, making impressive baking accessible. Imagine the vibrant ruby filling glistening under a golden, flaky crust, filling your home with a comforting aroma. This family-friendly recipe is ideal for busy parents seeking memorable desserts without hours of effort.

Ingredient List for Your Dreamy Ruby Cherry Pie
- Fresh or frozen tart cherries: 6 cups (about 900g), pitted. The star of your Ruby Cherry Pie, providing that perfect sweet-tart balance. (My test kitchen tip: I often use frozen cherries; they’re already pitted and always available.)
- All-purpose flour: 2 ½ cups (300g), plus more for dusting. Forms the foundation for your tender, flaky pie crust. (Use gluten-free flour blend for a gluten-free option.)
- Unsalted butter: 1 cup (226g), very cold and cubed. Crucial for rich flavor and a melt-in-your-mouth crust texture. (I always use unsalted for better flavor control; or try a plant-based butter for dairy-free.)
- Granulated sugar: ¾-1 cup (150-200g). Balances the tartness of the cherries for a harmonious filling; adjust to taste.
- Cornstarch or tapioca starch: ¼ cup (30g). Ensures your filling is perfectly set, not runny, for clean slices.
- Fresh lemon juice: 1 tablespoon (15ml). Brightens the cherry flavor and adds a touch of zest, enhancing the natural fruit notes.
- Salt: 1 teaspoon for crust, pinch for filling. Enhances all the other flavors in both crust and filling.
- Vanilla extract: ½ teaspoon. A warm, aromatic complement to the cherries.
- Egg: 1 large, for egg wash. Gives your lattice top a beautiful golden sheen and a professional finish.
- Water: 6-8 tablespoons ice water for crust, 1 tablespoon for egg wash. Essential for bringing the dough together without overworking.
Culinary Notes:
- Always use tart cherries for the best classic flavor balance; sweet cherries will require significant sugar reduction.
- Keep your butter and water ice-cold for the flakiest pie crust imaginable.
- Avoid overworking the pie dough to ensure tenderness, not toughness.
- A tiny splash of almond extract (just ¼ teaspoon) or a pinch of fresh lemon zest can truly elevate the cherry filling.
Step-by-Step Guide to Baking a Perfect Ruby Cherry Pie
Preparing Your Flaky Pie Crust
- In a large bowl, whisk together 2 ½ cups all-purpose flour (300g) and 1 teaspoon salt (5g) until combined.
- Cut in 1 cup (226g) very cold, cubed unsalted butter using a pastry blender or food processor until pea-sized crumbs form, ensuring the butter remains distinct.
- Gradually add 6-8 tablespoons (90-120ml) of ice water, mixing until just combined and the dough comes together into a shaggy ball, feeling cool to the touch.
- Divide dough into two discs, wrap tightly, and chill for at least 30 minutes (or up to 2 days) to allow the gluten to relax and butter to firm up.
- On a lightly floured surface, roll out one disc for the bottom crust to fit a 9-inch pie plate, aiming for an even ¼-inch thickness. Trim edges, leaving a ½-inch overhang.
Crafting the Ruby Cherry Filling
- In a large bowl, combine 6 cups pitted tart cherries (about 900g, fresh or thawed frozen, drained to prevent a watery pie).
- Add ¾-1 cup granulated sugar (150-200g, adjust to cherry tartness), ¼ cup cornstarch or tapioca starch (30g), 1 tablespoon fresh lemon juice (15ml), ½ teaspoon vanilla extract, and a pinch of salt.
- Mix gently to combine, ensuring cherries are evenly coated and glistening with the sugar mixture.
Assembling the Lattice Top Pie
- Pour the cherry filling into the prepared bottom pie crust, spreading it evenly.
- Roll out the second dough disc for the lattice top. Using a pastry wheel or knife, cut into 1-inch wide strips, keeping them uniform.
- Arrange strips over the filling in a classic lattice pattern, weaving them carefully. Trim excess dough, then crimp the edges of both crusts together to seal, creating a decorative border.
- In a small bowl, whisk 1 egg with 1 tablespoon water for an egg wash. Brush generously over the lattice top and crimped edges, noting the developing golden sheen. Sprinkle with 1-2 tablespoons granulated sugar for extra sparkle and a crisp finish.
Baking for Golden Perfection
- Preheat your oven to 400°F (200°C) with a rack in the lower third for even bottom crust baking.
- Place the pie on a baking sheet to catch any drips, preventing oven messes. Bake for 15 minutes, allowing the crust to begin firming.
- Reduce oven temperature to 375°F (190°C) and continue baking for 40-50 minutes, or until the Ruby Cherry Pie crust is golden brown and the filling is visibly bubbly and thick.
- If the crust edges brown too quickly, gently tent the pie with aluminum foil to protect them. This prevents burning while the center bakes.
- Remove from oven and let cool completely on a wire rack for at least 3-4 hours to allow the filling to set properly, ensuring clean, perfect slices.
Quick Safety & Troubleshooting Notes:
- Always ensure all cherry pits are removed if using fresh cherries to prevent a surprise.
- Prevent burnt edges by using a pie crust shield or foil strips if you notice quick browning.
- Cooling the Ruby Cherry Pie completely is crucial for a perfectly set, sliceable filling that doesn’t collapse.
Best Occasions & Creative Ways to Enjoy Your Ruby Cherry Pie
- Serve for family weeknights, special guests, or holiday gatherings like the 4th of July.
- Warmed slices with vanilla ice cream, or crumbled into yogurt make delightful leftover treats.
- Store at room temperature 1-2 days, or refrigerated up to 4-5 days. Freeze a baked Ruby Cherry Pie tightly wrapped for up to 3 months; thaw and gently reheat.
The Joy & Comfort Benefits of a Homemade Ruby Cherry Pie
This classic dessert brings warmth and joy, fostering cherished family memories as ultimate comfort food. Control sugar and ingredient quality, providing natural vitamins in a balanced indulgence. Serving a beautiful, homemade Ruby Cherry Pie offers pride and a budget-friendly treat for any occasion.
Cost, Time & Ease Breakdown for Homemade Ruby Cherry Pie
- Active Prep: 30-45 minutes; Crust Chilling: Minimum 30 minutes.
- Bake Time: 55-65 minutes; Cooling: 3-4 hours (essential).
- An entire homemade Ruby Cherry Pie costs $8-$15, offering significant savings. I often freeze one dough disc for convenience. Consider baking two Ruby Cherry Pies at once for future easy meals.

Smart Shopping for Your Ruby Cherry Pie Ingredients
Source ingredients from supermarkets (frozen tart cherries, flour, butter) or farmer’s markets for fresh, peak-season cherries. Frozen cherries are convenient and pitted. Opt for organic cherries, high-quality butter, and organic flour for superior taste. Read labels for unsweetened frozen cherries.
Customization & Adjustments
Elevate flavor with cinnamon, fresh ginger, or dried cranberries. Adjust sugar based on cherry tartness; fine-tune with lemon juice. For a gluten-free Ruby Cherry Pie, use a certified GF crust mix. Swap dairy butter for plant-based alternatives. Use sugar substitutes for lower-sugar diets.
Reader Q&A About Ruby Cherry Pie
Can I freeze this Ruby Cherry Pie after cooking?
Yes, cool completely, then wrap tightly. It freezes well for up to 3 months. Thaw overnight, then reheat gently at 300°F (150°C). Great for meal prep.
What’s a healthier approach to this Ruby Cherry Pie?
Reduce sugar, use whole wheat pastry flour, and prioritize fresh, quality tart cherries. Enjoy this Ruby Cherry Pie as a balanced indulgence, focusing on wholesome ingredients for your family.
Is Ruby Cherry Pie suitable for weight loss diets?
Ruby Cherry Pie is a dessert; enjoy in moderation. It’s not typically a weight loss food, but mindful portions fit into a healthy lifestyle.
How do I prevent a soggy bottom crust on my Ruby Cherry Pie?
Blind baking helps. Ensure filling isn’t too wet, and start baking the Ruby Cherry Pie at a slightly higher temperature. A baking sheet also ensures a crisp base.
What’s the best way to get a perfectly golden crust?
An egg wash (egg + water) brushed over the crust creates a beautiful golden sheen. I also sprinkle a little sugar on top for sparkle and crunch.
Can I use store-bought pie crust for this recipe?
Yes, for a quick shortcut, use two store-bought pie crusts. Just follow the instructions for the cherry filling and baking times, making this Ruby Cherry Pie easier.
How long should my Ruby Cherry Pie cool before slicing?
Crucially, let your Ruby Cherry Pie cool for at least 3-4 hours at room temperature. This allows the filling to fully set, ensuring clean, perfect slices.
You now have all the tools to bake a truly unforgettable Ruby Cherry Pie With Lattice Top, delivering incredible taste and a stunning dessert for any meal. Pin this recipe to Pinterest for a reliable, family-friendly option and make delicious memories!
Print
cherry pie recipe Ruby Cherry Pie With Lattice Top
- Total Time: 315 minutes
- Yield: 8 servings 1x
- Diet: General
Description
This Ruby Cherry Pie features a vibrant, sweet-tart cherry filling baked under a golden, flaky lattice crust, making it an impressive yet accessible dessert perfect for any family gathering. It combines simple techniques with classic flavors for a showstopping finish.
Ingredients
- 6 cups tart cherries, pitted (fresh or frozen)
- 2.5 cups all-purpose flour, plus more for dusting
- 1 cup unsalted butter, very cold and cubed
- 0.75 cup granulated sugar (adjust to taste)
- 0.25 cup cornstarch or tapioca starch
- 1 tablespoon fresh lemon juice
- 1 teaspoon salt, plus a pinch for filling
- 0.5 teaspoon vanilla extract
- 1 large egg, for egg wash
- 6 to 8 tablespoons ice water, plus 1 tablespoon for egg wash
Instructions
- Prepare Pie Crust Dough: In a large bowl, whisk together 2.5 cups all-purpose flour and 1 teaspoon salt. Cut in 1 cup very cold, cubed unsalted butter using a pastry blender or food processor until pea-sized crumbs form. Gradually add 6-8 tablespoons of ice water, mixing until just combined and the dough comes together into a shaggy ball.
- Chill Dough Discs: Divide the dough into two discs, wrap tightly, and chill for at least 30 minutes (or up to 2 days).
- Prepare Bottom Crust: On a lightly floured surface, roll out one dough disc to fit a 9-inch pie plate, aiming for an even 0.25-inch thickness. Trim edges, leaving a 0.5-inch overhang.
- Craft Cherry Filling: In a large bowl, combine 6 cups pitted tart cherries (drained if frozen and thawed). Add 0.75 cup granulated sugar, 0.25 cup cornstarch or tapioca starch, 1 tablespoon fresh lemon juice, 0.5 teaspoon vanilla extract, and a pinch of salt. Mix gently to combine.
- Assemble Pie and Form Lattice: Pour the cherry filling into the prepared bottom pie crust, spreading it evenly. Roll out the second dough disc and cut into 1-inch wide strips. Arrange strips over the filling in a classic lattice pattern, weaving carefully. Trim excess dough, then crimp the edges of both crusts together to seal and create a decorative border.
- Apply Egg Wash and Sugar: In a small bowl, whisk 1 large egg with 1 tablespoon water for an egg wash. Brush generously over the lattice top and crimped edges. Sprinkle with 1-2 tablespoons granulated sugar for extra sparkle.
- Preheat Oven and Initial Bake: Preheat oven to 400°F (200°C) with a rack in the lower third. Place the pie on a baking sheet. Bake for 15 minutes.
- Reduce Heat and Continue Baking: Reduce oven temperature to 375°F (190°C) and continue baking for 40-50 minutes, or until the crust is golden brown and the filling is visibly bubbly and thick. (If edges brown too quickly, gently tent with aluminum foil.)
- Cool Completely: Remove from oven and let cool completely on a wire rack for at least 3-4 hours to allow the filling to set properly, ensuring clean slices.
Notes
Always use tart cherries for the best classic flavor balance. Keep butter and water ice-cold for the flakiest pie crust. Avoid overworking the pie dough for tenderness. A tiny splash of almond extract (0.25 teaspoon) or a pinch of fresh lemon zest can elevate the cherry filling. Ensure all cherry pits are removed. Prevent burnt edges with a pie crust shield or foil strips. Cooling completely is crucial for a perfectly set, sliceable filling.
- Prep Time: 75 minutes
- Cook Time: 60 minutes
- Category: Dessert
- Method: Baking
- Cuisine: American
Nutrition
- Serving Size: 1 slice (approx. 150 g)
- Calories: 350 calories
- Sugar: 30 g
- Sodium: 250 mg
- Fat: 18 g
- Saturated Fat: 10 g
- Unsaturated Fat: 7 g
- Trans Fat: 0 g
- Carbohydrates: 45 g
- Fiber: 3 g
- Protein: 4 g
- Cholesterol: 40 mg